⚙️ Settings Menu Reference
The Settings menu, accessible via the gear icon on the main dashboard, is where you configure drone behavior, manage safety parameters, calibrate sensors, and view system information. The menu is divided into four main tabs.
🚁 Drone Settings Tab
This tab controls the hardware configuration and flight limits.
📸 Camera
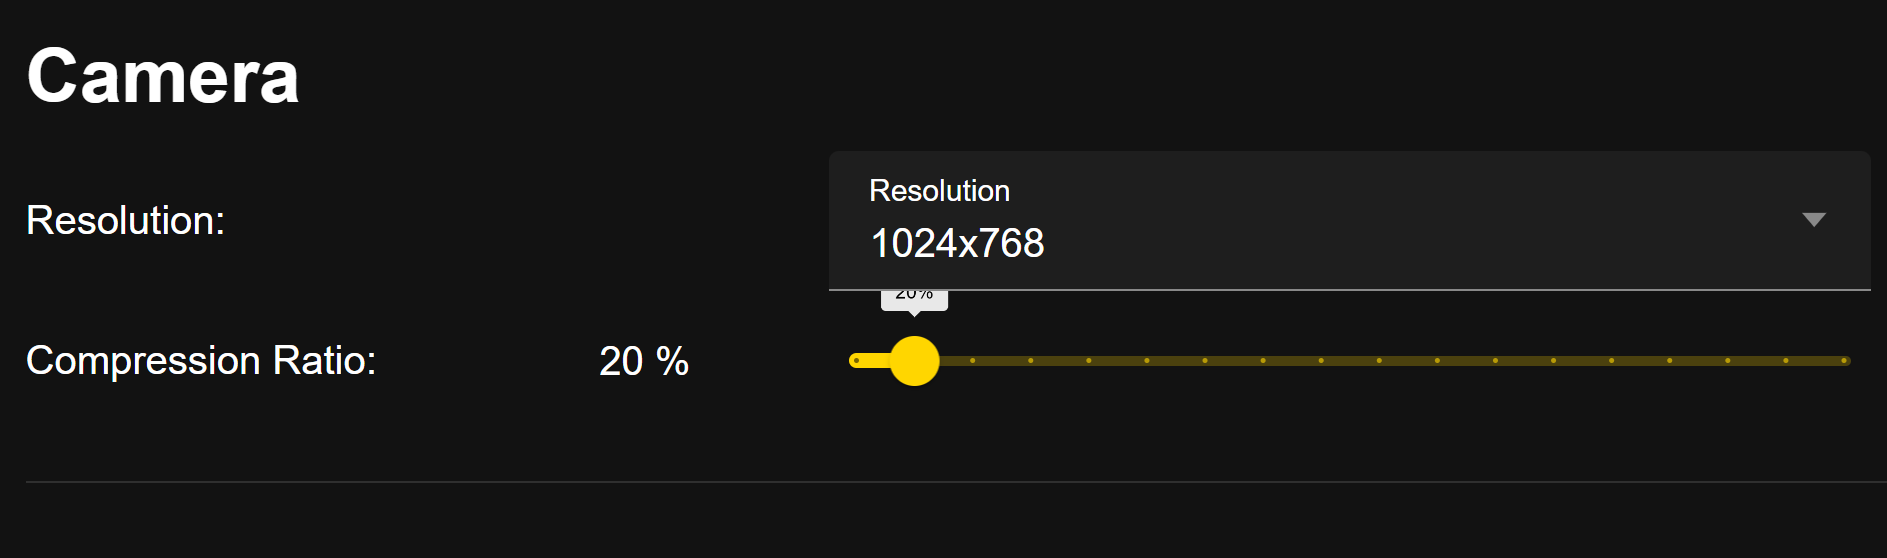
The Camera settings allow you to customize the video and photo quality, including the Resolution and Compression Ratio , for all media captured by the drone.
TIP
Selecting a lower resolution and increasing the compression ratio will result in a faster live video stream (higher FPS and lower delay/latency), prioritizing transmission performance over media file quality.
| Setting | Description | Range |
|---|---|---|
| Resolution | Defines the image and video quality in pixels. Lower resolution uses less bandwidth and storage, significantly improving the live stream rate (FPS) and lowering latency. | 320x240, 480x320, 640x480, 800x600, 1024x768 |
| Compression Ratio | Controls the file size and quality of captured media. A lower ratio (e.g., 15%) means higher image quality but results in larger file sizes and may reduce live video performance. | Slider (0% - Highest Quality to 100% - Lowest Quality) |
TIP
🤖 Recommended Settings for Image Processing
For reliable image processing and computer vision tasks, the optimal balance is achieved with:
- Resolution:
640x480 - Compression Ratio:
30%
This configuration ensures sufficient detail for algorithms to work effectively while maintaining the low latency (delay) required for real-time control.
⚠️ Safety
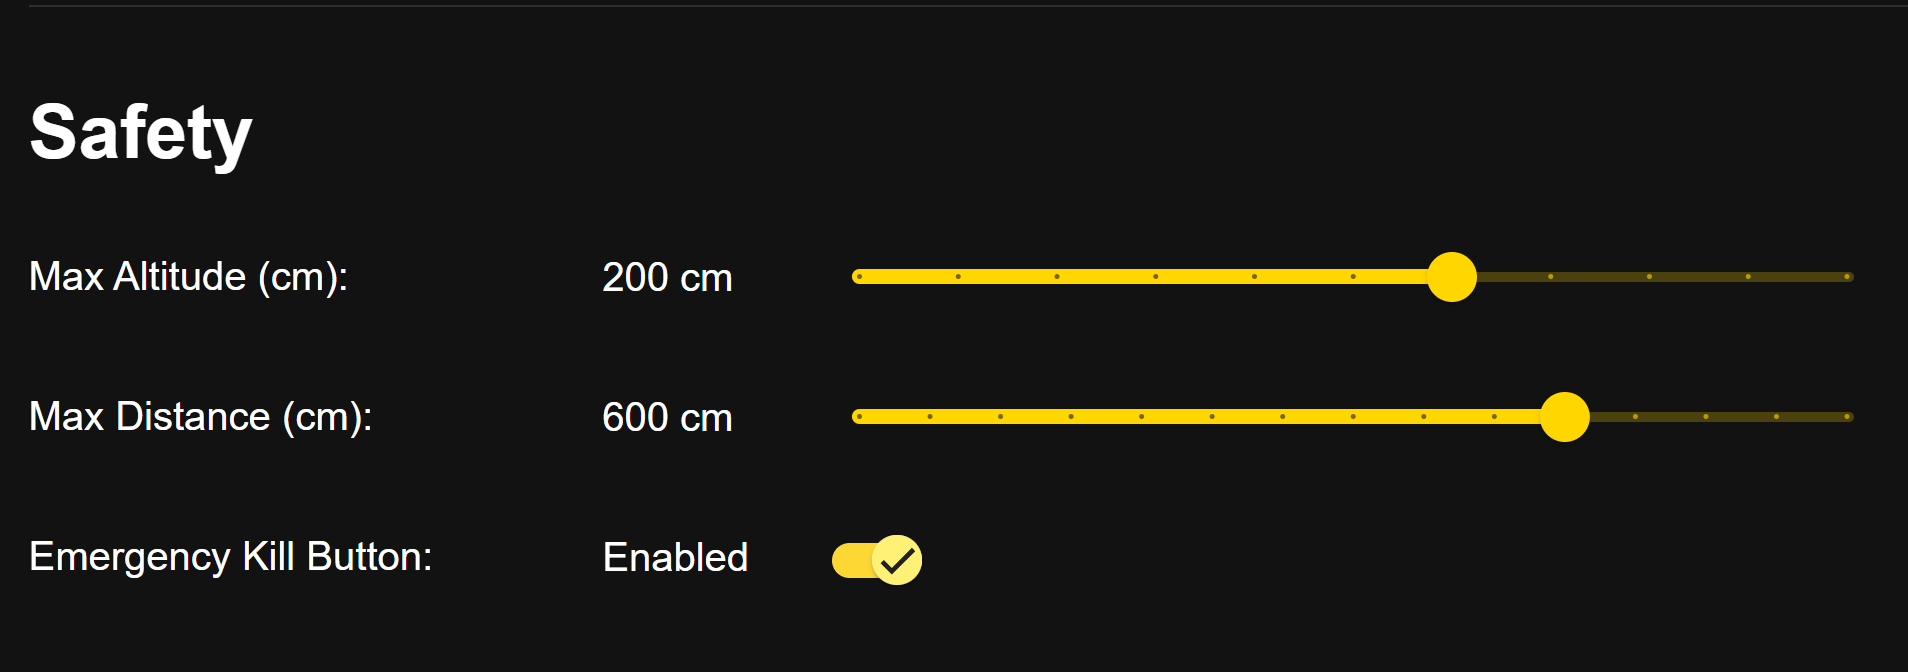
The Safety settings allow you to define crucial limits on the drone's flight envelope to ensure secure operation in all environments.
| Setting | Description | Control Type |
|---|---|---|
| Max Altitude (cm) | Sets the absolute maximum height the drone is allowed to fly. The maximum limit is 300cm(3 meters) above the surface below the drone at any given moment during flight. | Slider |
| Max Distance (cm) | Sets the maximum horizontal range the drone can fly from the Home Point (point of takeoff/activation). The maximum limit is 800cm(8 meters). | Slider |
| Emergency Kill Button | CRITICAL: When enabled, allows for immediate motor shut-off via a designated button/stick command. It is highly recommended to keep this Enabled. | Toggle Switch |
DANGER

- EMERGENCY KILL BUTTON: The large red "
KILL" button is a critically important emergency stop feature that immediately cuts power to all motors in any condition. Only use the KILL button in an emergency to prevent injury to people or catastrophic damage to property.
💡 Bottom Flash LED
This setting allows you to control the intensity (brightness) of the Bottom Flash Light LED. This light is primarily used to aid in low-light landing and to improve ground visibility.

| Setting | Description | Control Type |
|---|---|---|
| Default Brightness | Controls the intensity (brightness) of the drone's bottom-facing LED light. | Slider (15% minimum to 100% maximum) |
Battery Consumption Warning
Setting the Default Brightness to the maximum (100%) will result in significantly increased battery consumption by the drone, which will consequently reduce your overall flight time. Use high brightness only when necessary.
Advanced Control
The Bottom Flash Light LED can also be controlled and programmed using coding languages such as Blockly, Python, and Arduino.
🛠️ Calibration Tab
This tab is dedicated to maintaining the accuracy of the drone's critical flight sensors. All calibrations should be performed on a level, stable surface.
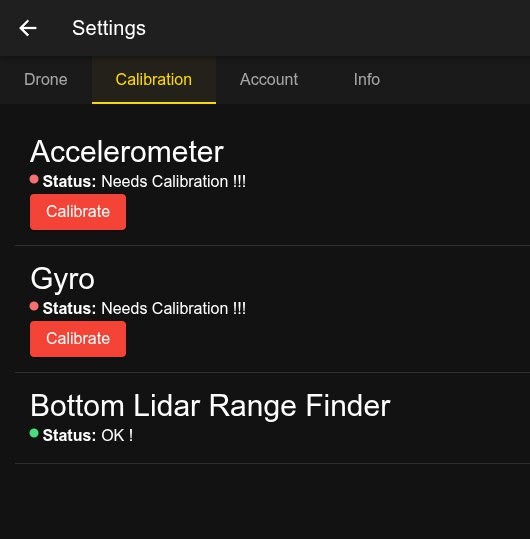
Image 1: Before Calibration - Sensors showing 'Needs Calibration !!!'
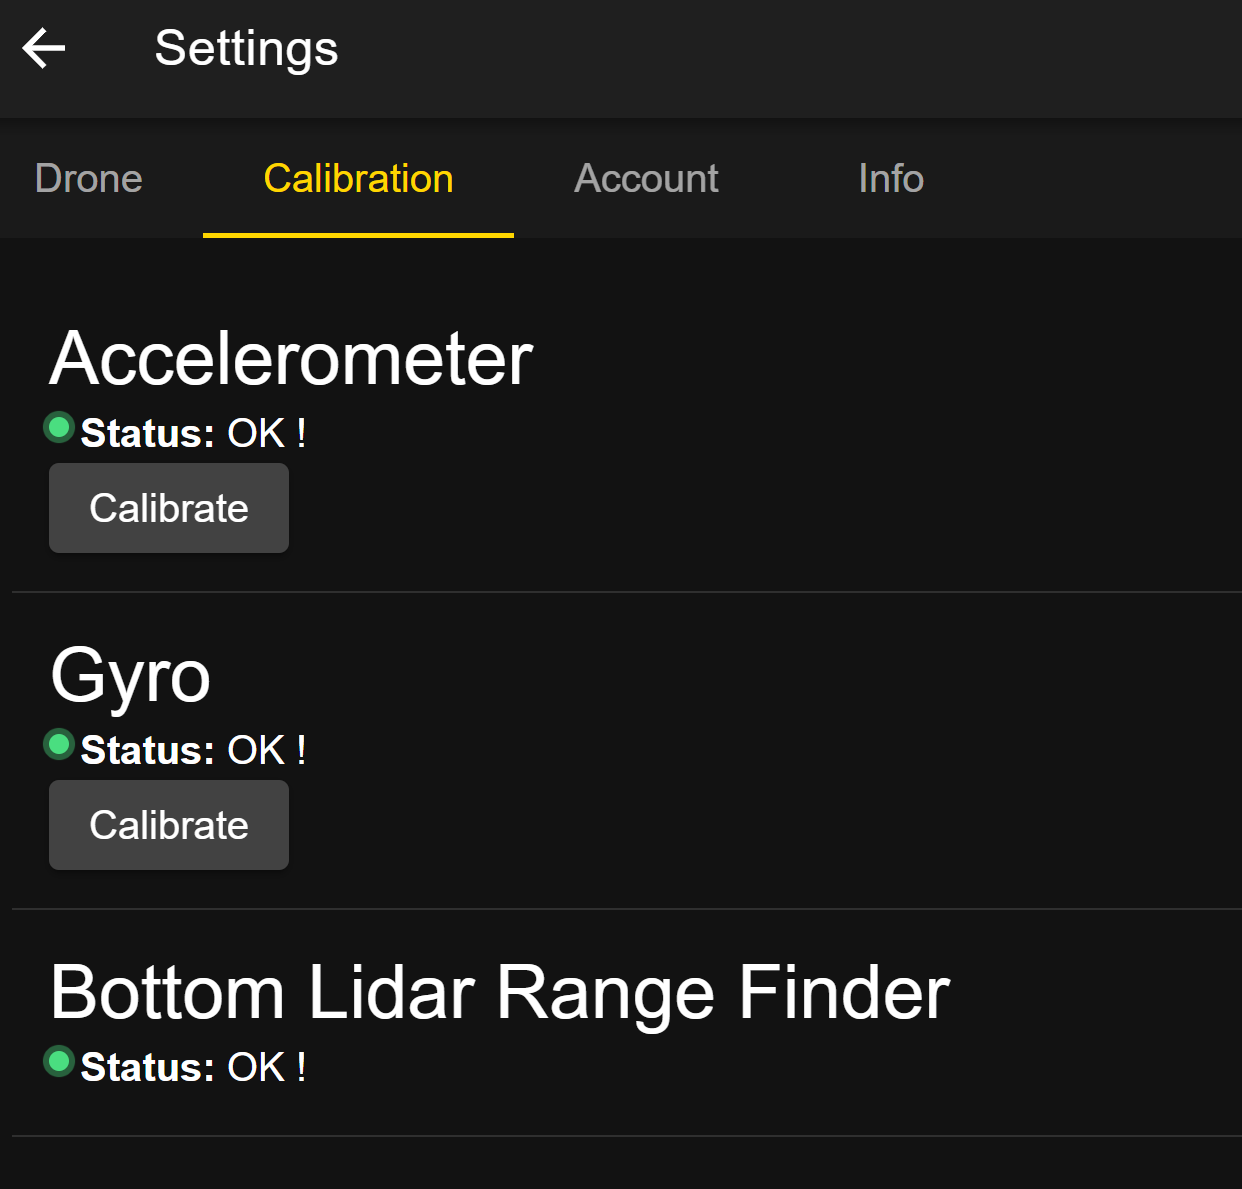
Image 2: After Calibration - All sensors showing 'OK !'
| Sensor | Status Indicator | Action | Purpose |
|---|---|---|---|
| Accelerometer | 🔴 Status: Needs Calibration !!! (Before) / 🟢 Status: OK ! (After) | Calibrate Button | Calibrates the sensor that measures the drone's linear acceleration and tilt, ensuring accurate movement detection. |
| Gyro | 🔴 Status: Needs Calibration !!! (Before) / 🟢 Status: OK ! (After) | Calibrate Button | Calibrates the sensor that measures the drone's angular velocity (rotation), crucial for stable flight. |
| Bottom Lidar Range Finder | 🟢 Status: OK ! (Usually) | (No Button) | Status check for the sensor used for precision altitude holding and safe landing. This sensor typically does not require user calibration. |
TIP
For detailed, step-by-step instructions on performing these calibrations, including the IMU (Accelerometer and Gyro), please refer to the IMU Calibration page.
🔴🟡 CRITICAL WARNING: Sensor Error
If the drone's RGB LEDs start flashing alternating RED and YELLOW (🔴🟡), this indicates a critical IMU sensor error and confirms that the Accelerometer and Gyro need immediate calibration.
- Action Required: You must immediately refer to the IMU Calibration page to resolve this.
👤 Account Tab
This section allows the user to view and manage their RoBeeX account profile. For detailed guidance on creating, accessing, and managing your profile, please refer to the Account Management page.
ℹ️ Info Tab
This tab provides critical version and build information about the application, which is essential for reporting bugs or troubleshooting technical issues.
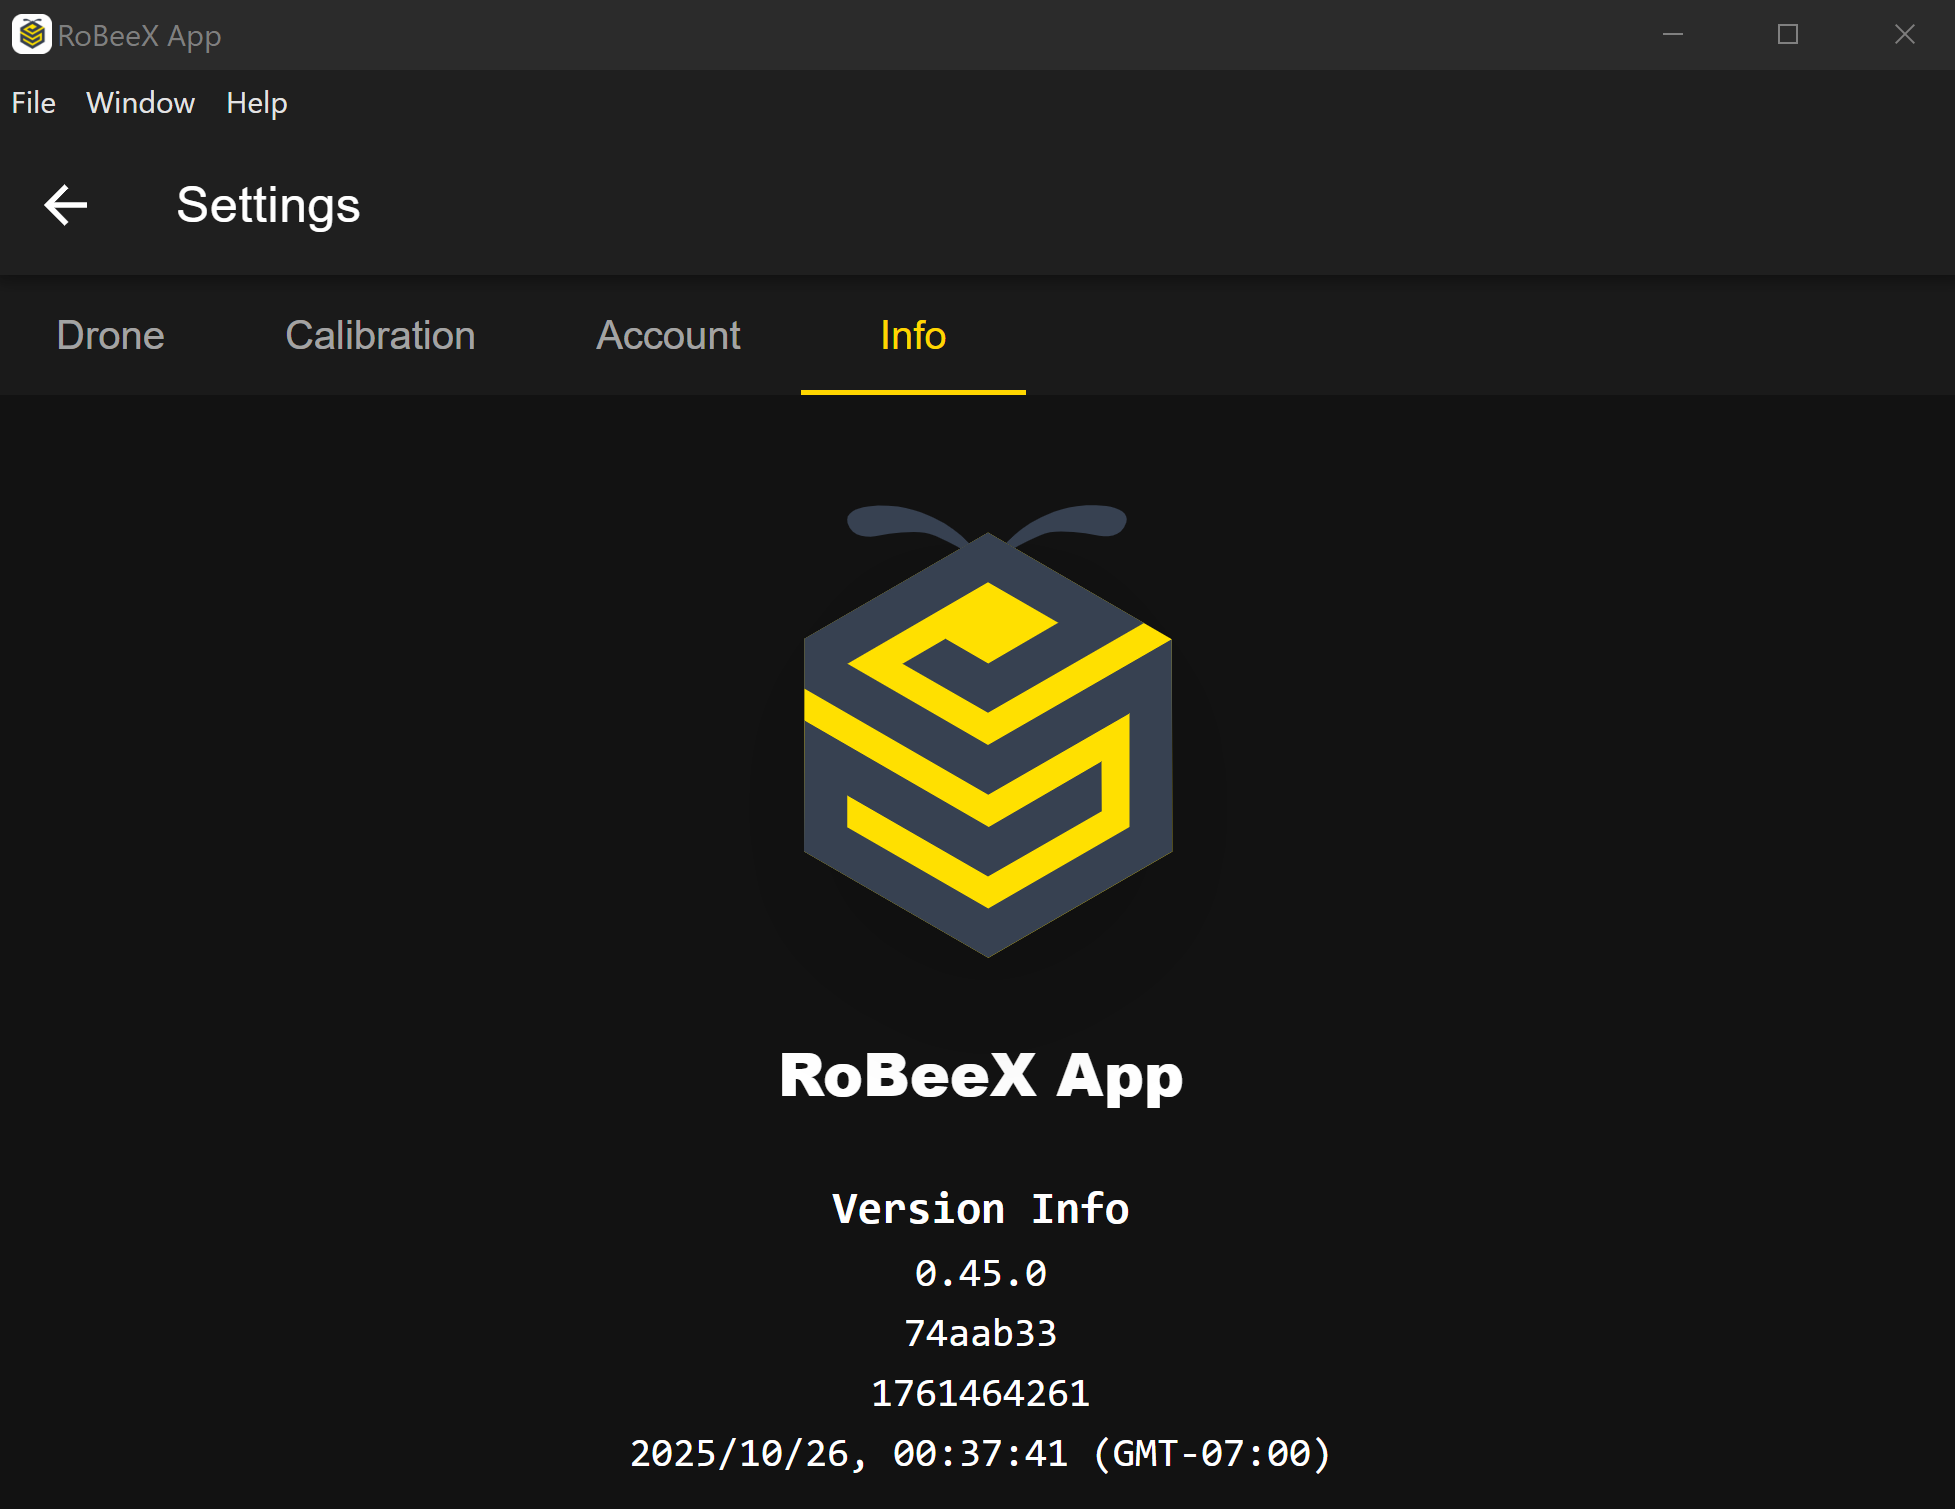
| Data Field | Example Value | Description |
|---|---|---|
| App Logo | (Image of the RoBeeX logo) | The visual identifier and branding of the application. |
| Version Info | 0.45.0 | The primary, user-facing software version number of the installed RoBeeX App. |
| Commit Hash / Build Number | 74aab33 | An internal reference code for the exact software build, primarily used by developers for support. |
| Build Timestamp | 2025/10/26, 00:37:41 | The precise date and time when the current version of the app was compiled. |