⚙️ IMU Sensor Calibration (Accelerometer & Gyroscope)
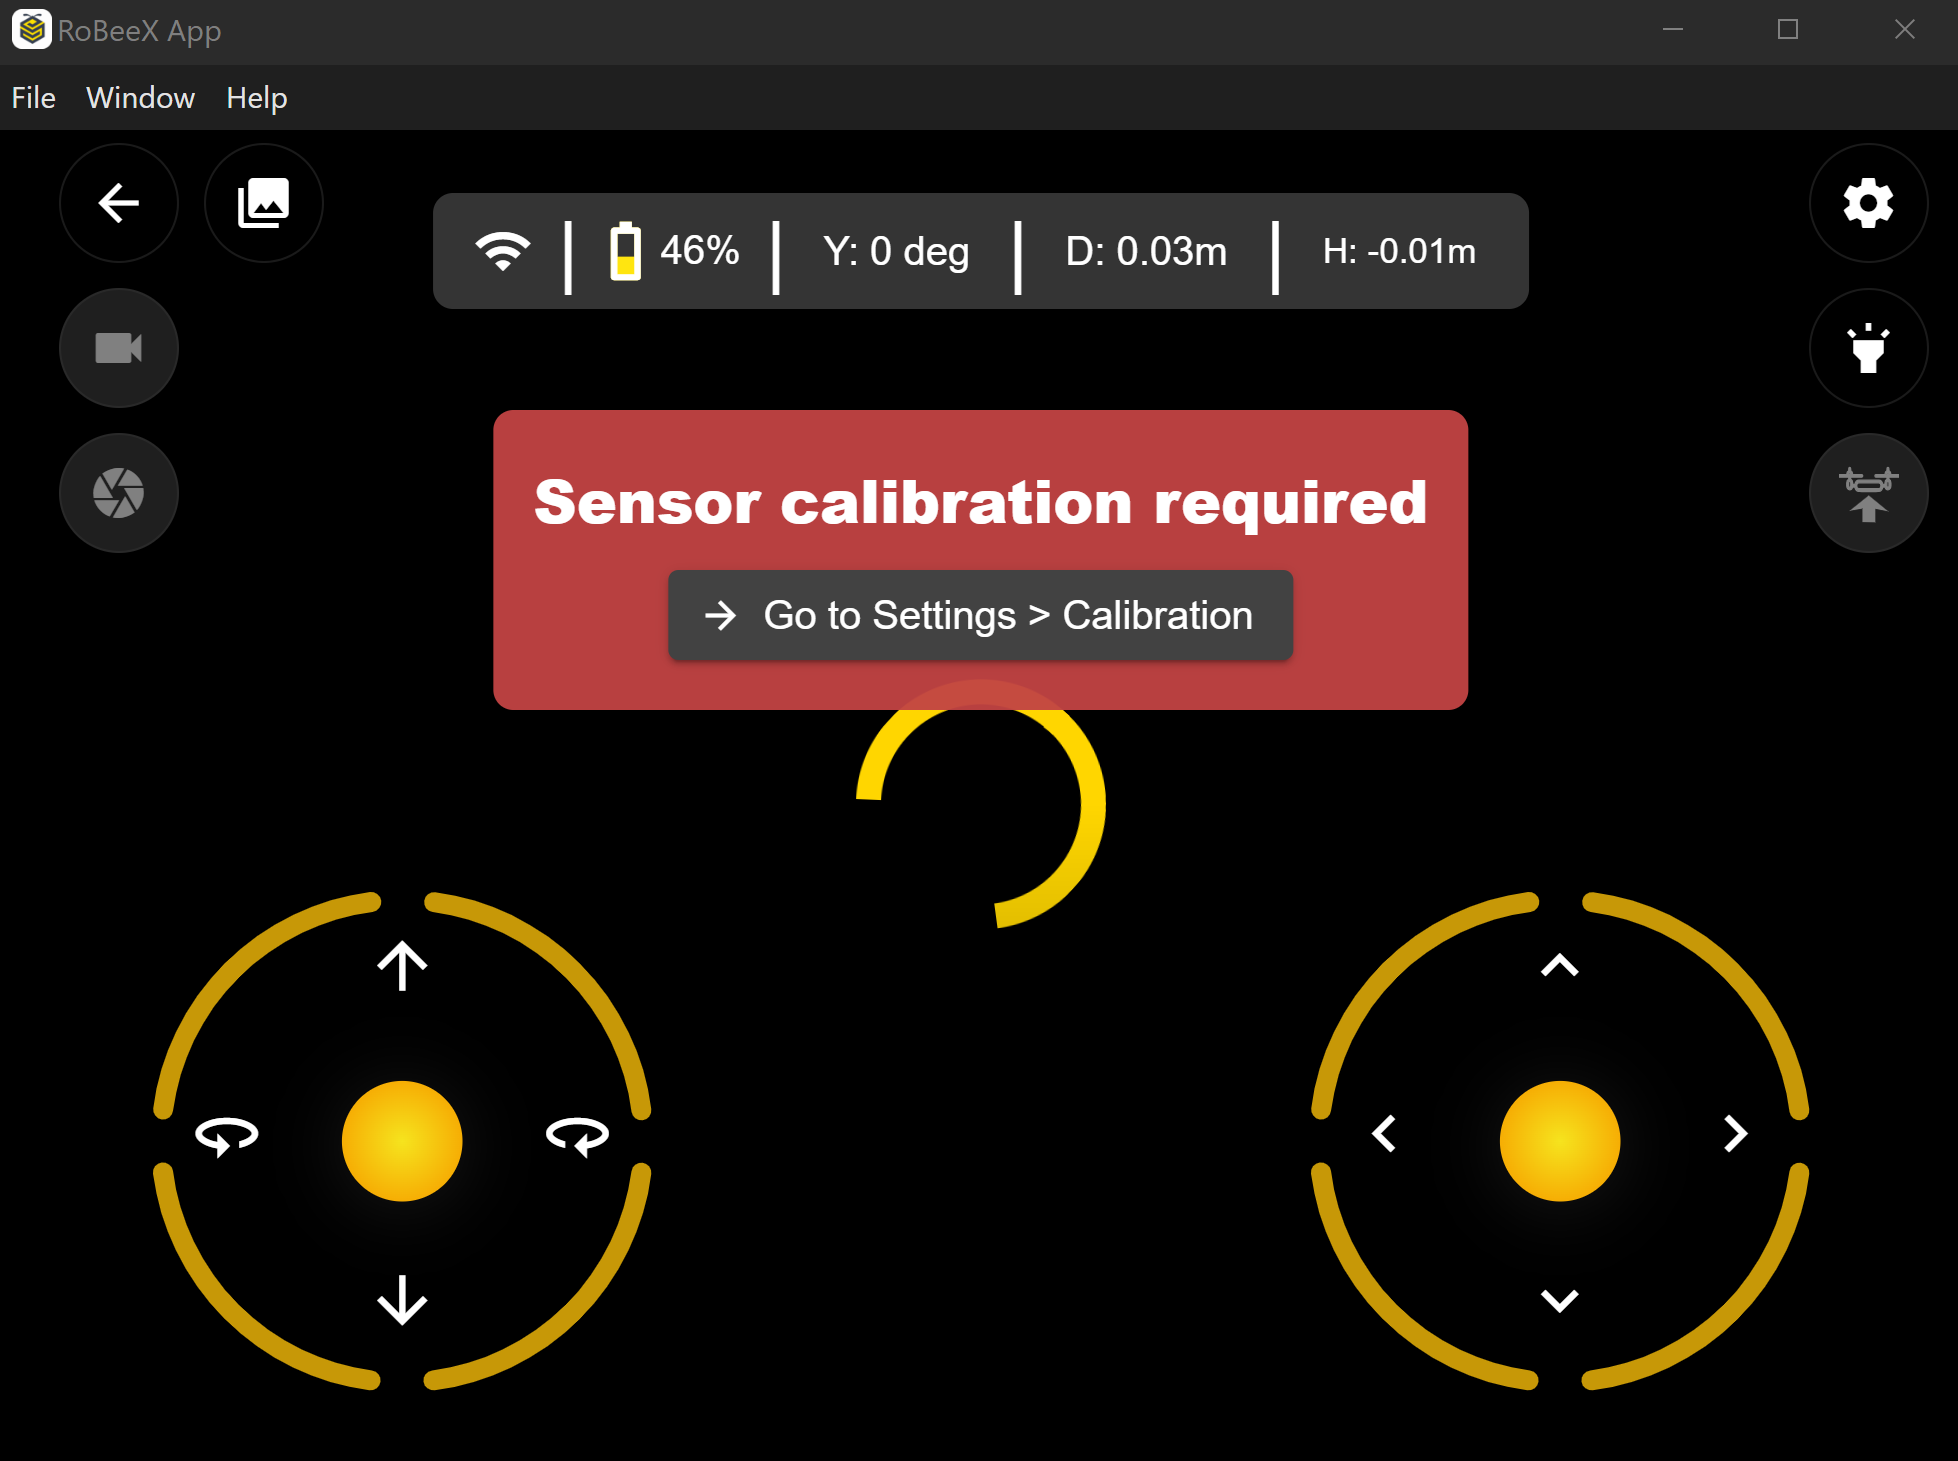
The Inertial Measurement Unit (IMU) is the core sensor package (Gyroscope and Accelerometer) critical for stable flight control. Recalibration is necessary following a crash, after hard landings, or when the RoBeeX app specifically requests it (e.g., when the Sensor calibration required message is shown on the flight screen).
DANGER
🔴🟡 CRITICAL WARNING: Sensor Error
If the drone's RGB LEDs start flashing alternating RED and YELLOW (🔴🟡), this indicates a critical sensor error and confirms that the IMU needs immediate calibration.
1. 🛠️ Preparation and Connection
Before beginning any calibration, ensure the following steps are complete:
Safety & Battery:
- Remove all propeller guards from the aircraft.
- Ensure the drone battery is above 50%.
Power & Wi-Fi Connection:
- Power On: Turn on your RoBeeX AI Drone.
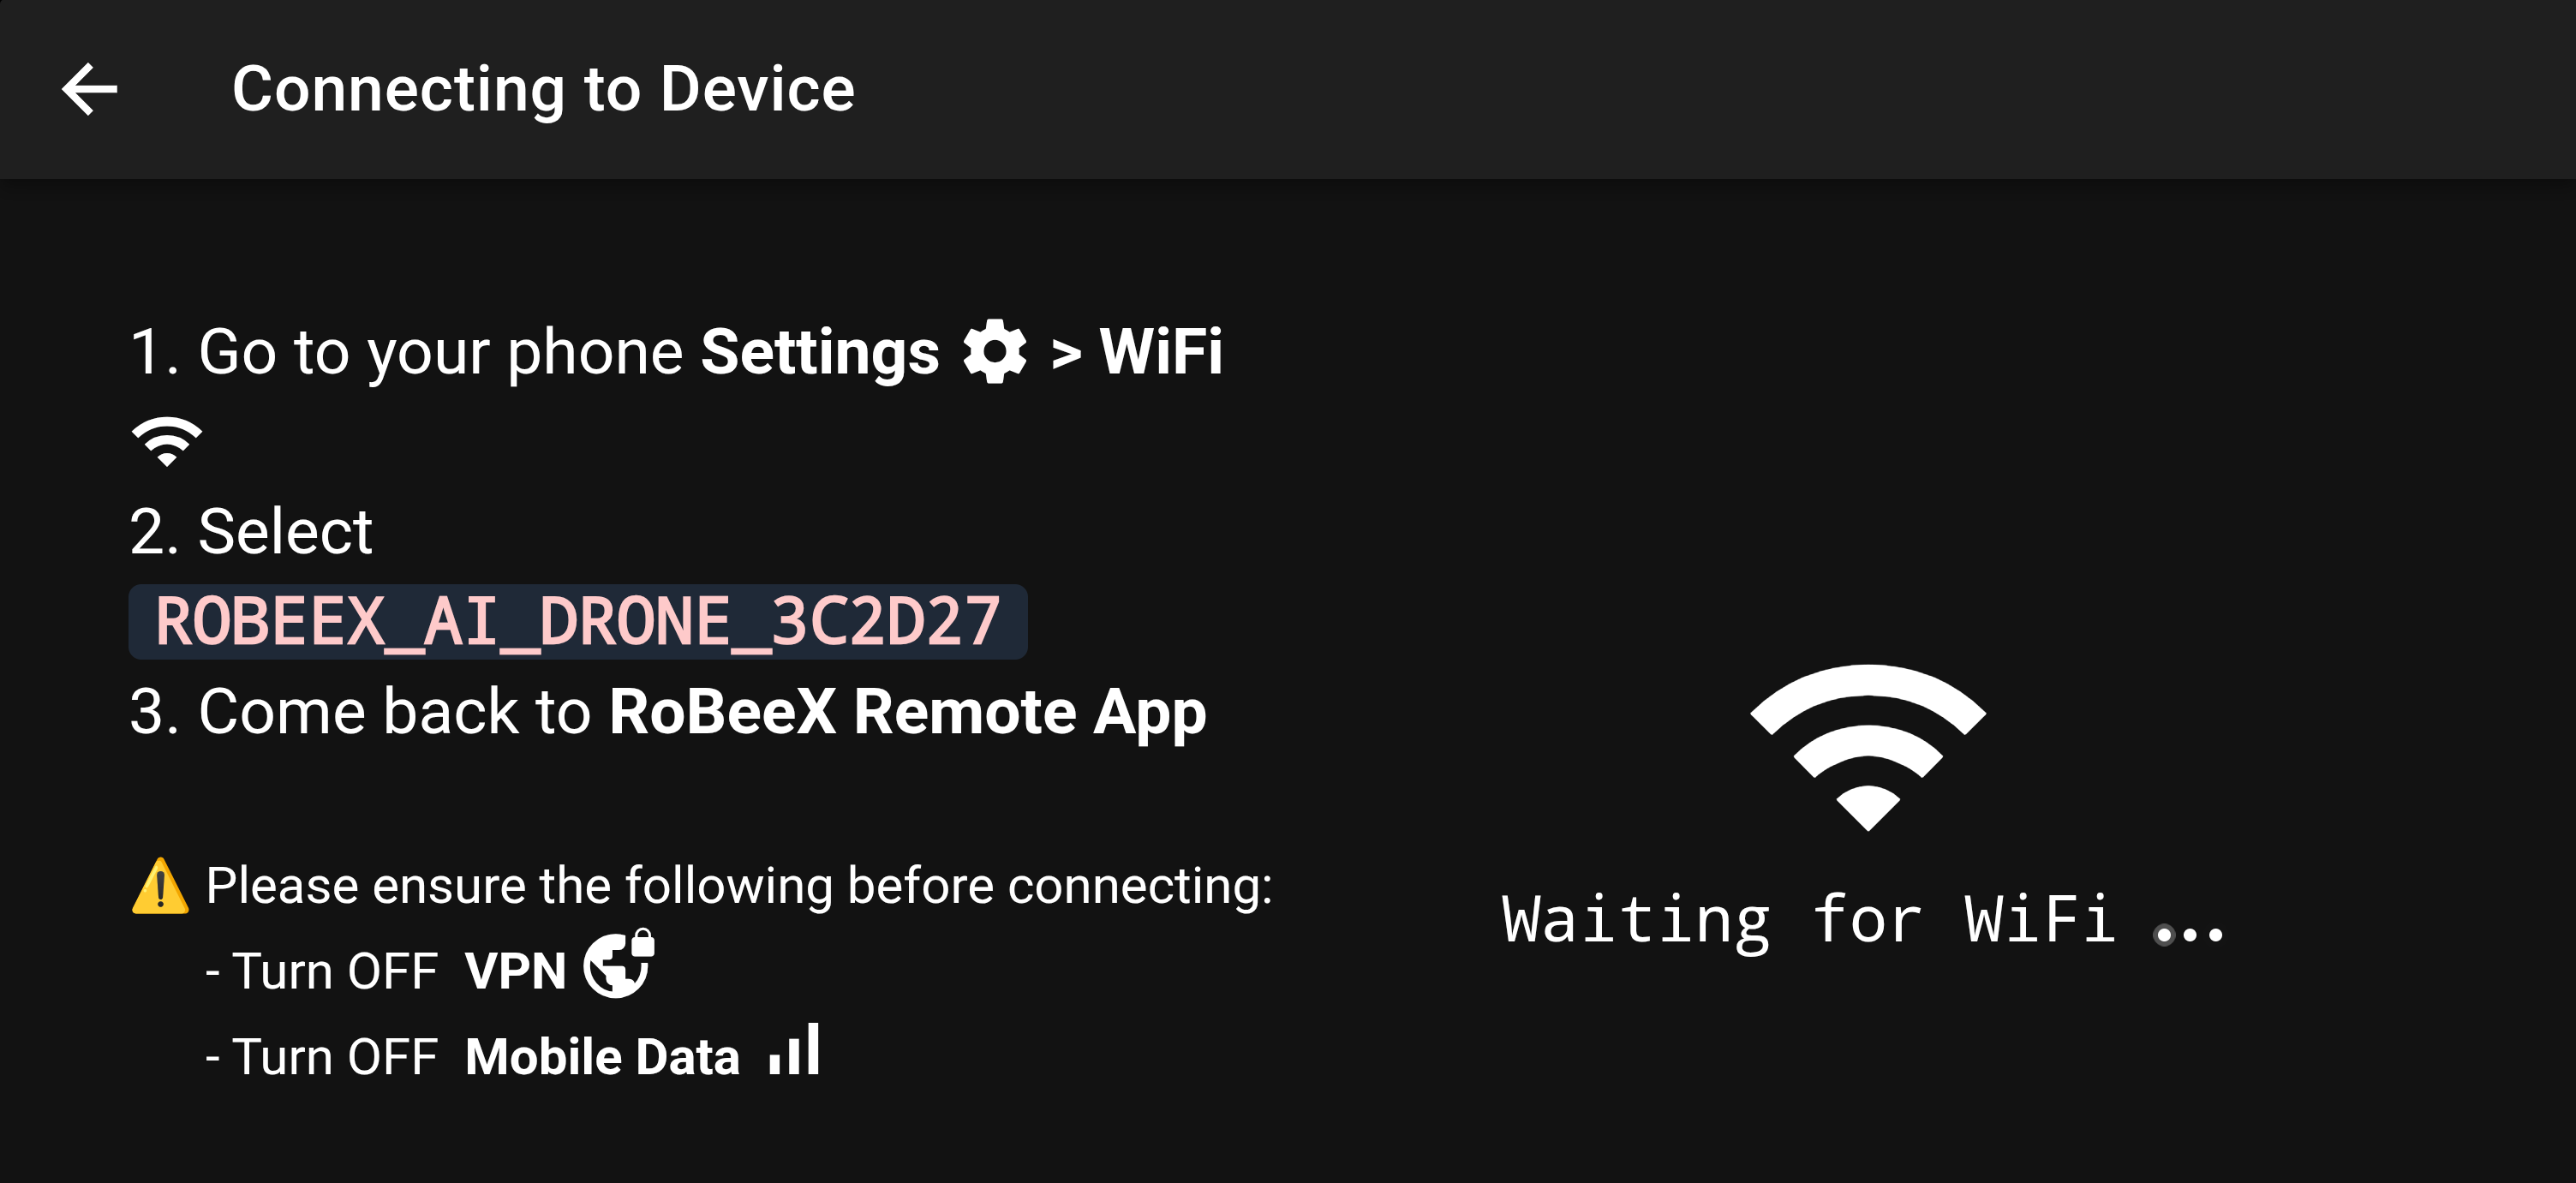
- Connect Mobile/PC: Go to your device's settings and manually connect to the drone's Wi-Fi network (e.g., ROBEEX_AI_DRONE_XXXXXX).
Wi-Fi Password: The default password for any RoBeeX AI Drone is
1234567890. - App Status: Return to the RoBeeX app. The main screen should now show "Connected".
🚨Connection Prerequisite Notice
IMPORTANT: Please ensure the following settings are TURNED OFF on your mobile device or laptop before attempting to connect to the RoBeeX Drone's Wi-Fi network:
- Turn Off VPN (Virtual Private Network).
- Turn Off Mobile Data.
These services can interfere with the direct peer-to-peer Wi-Fi connection required for communication with the drone.

2. 🎯 Gyroscope Calibration
The Gyroscope detects the drone's rotation. This simple procedure ensures zero-drift.
Procedure
- Positioning (CRITICAL):
- Place the RoBeeX drone on a surface that is perfectly level, flat, and stable (e.g., a solid table or floor).
- The drone must be perfectly still during the calibration.
- Initiation:
- Open the RoBeeX app and navigate to Settings → Calibration tab.
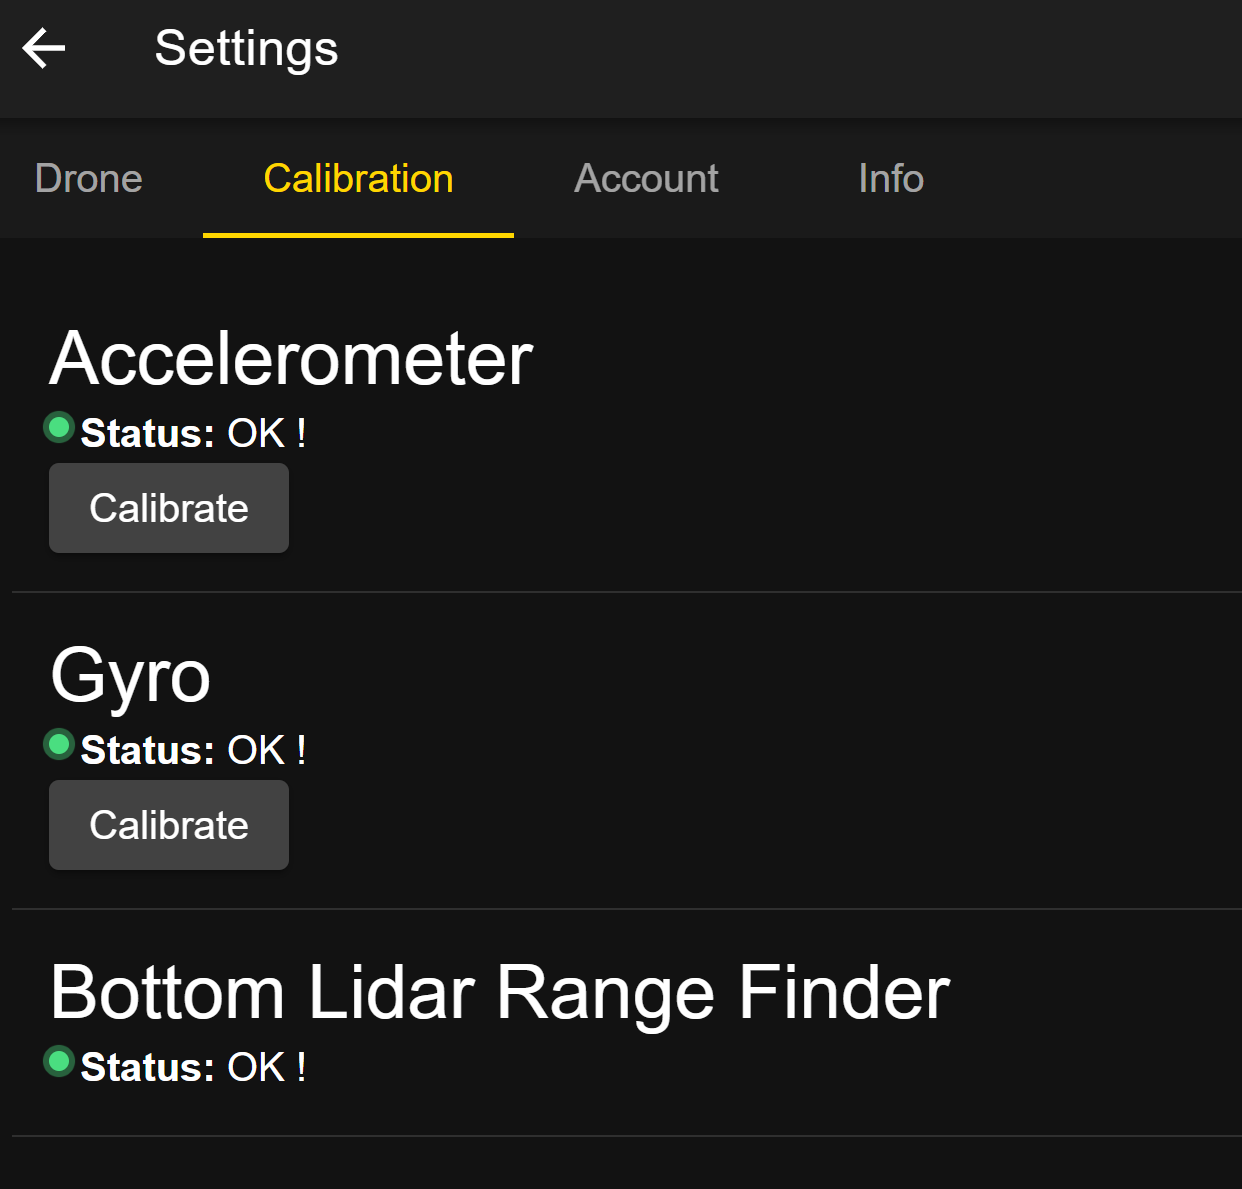
* Under the **Gyro** section, select **"Calibrate"**.
- Execution:
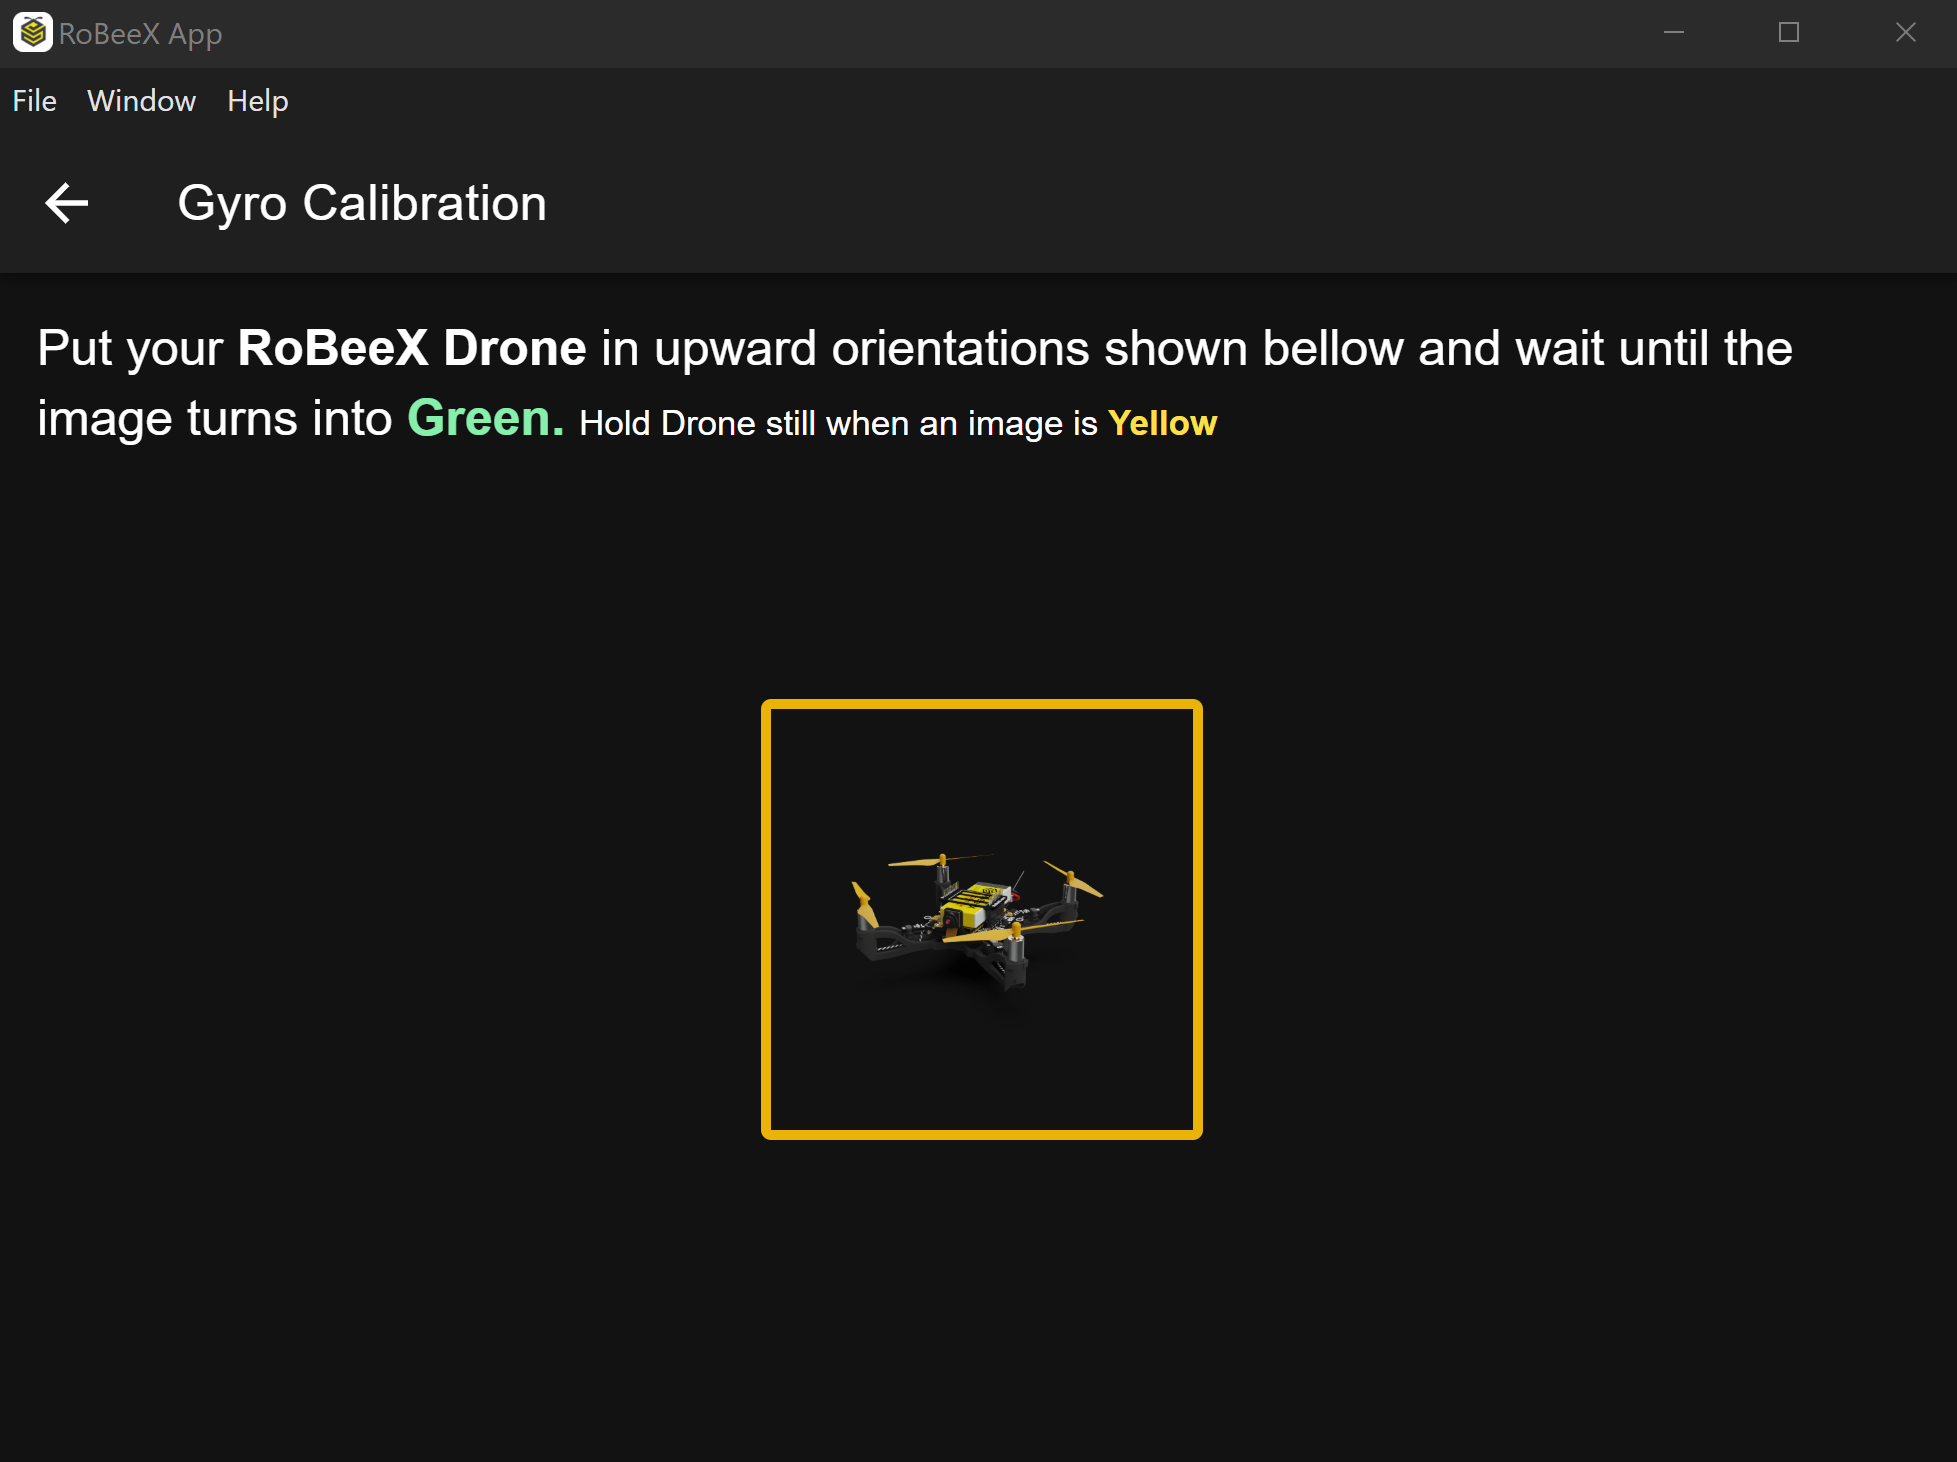
- The app will show a screen instructing you to hold the drone still until the image turns Green.
* Wait for the app to confirm successful completion with **"Status: OK !"**.
- Completion:
- After receiving a success confirmation, power cycle the drone (turn it off and back on) to apply the new settings before flight.
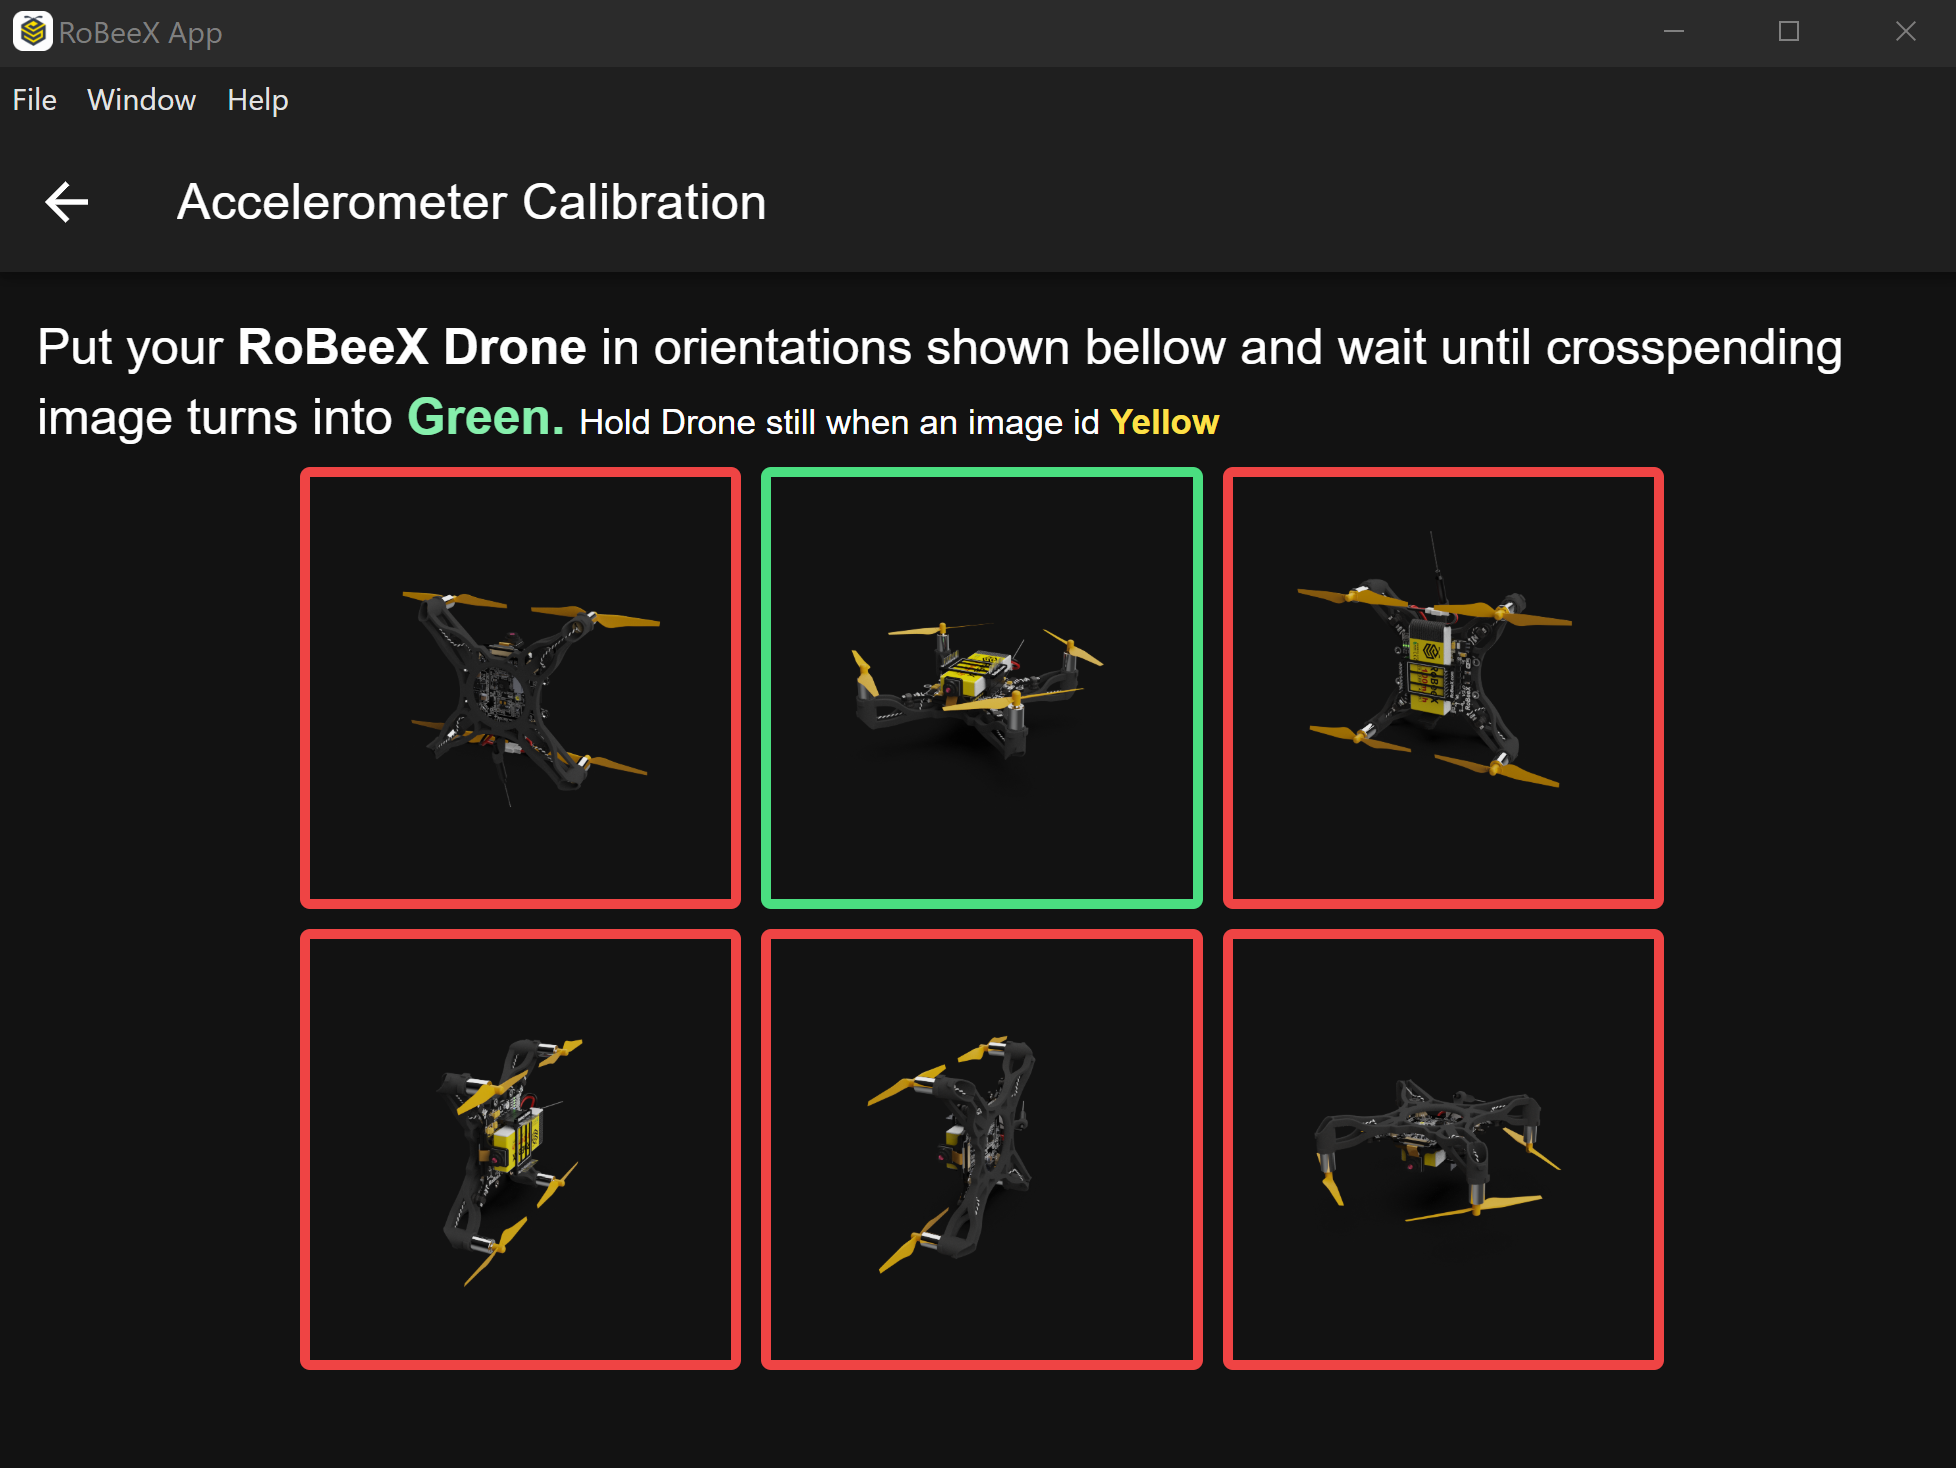
3. 📐 Accelerometer Calibration
🎥 Video Guide: How to calibrate accelerometer
The Accelerometer detects the drone's tilt. This procedure requires specific physical positioning of the drone.
Procedure
- Initiation:
- Open the RoBeeX app and navigate to Settings → Calibration tab.
- Under the Accelerometer section, select "Calibrate."
- Execution (Follow On-Screen Guide):
- Carefully follow the on-screen instructions to position the drone at each required angle.
- CRITICAL: Hold Drone still when an image is Yellow. The app will confirm when the orientation is successful by turning the box Green.
- Completion:
- The app will confirm when the entire calibration is successful.
- After receiving a success confirmation, power cycle the drone to apply the new settings.
⚠️ Troubleshooting Tip
| Issue | Potential Cause | Solution |
|---|---|---|
| Flashing Red/Yellow LEDs | IMU sensor requires immediate calibration. | Follow the Gyroscope and Accelerometer procedures above. |
| Calibration Failed | Drone was bumped or moved during the process. | Repeat the procedure, ensuring the drone is absolutely still. |
| Calibration Failed | Strong magnetic interference nearby. | Move the entire setup to a location free of large metal objects or electronics. |
| Unstable Flight | IMU calibration is either outdated or incomplete. | Recalibrate IMU; Sensor calibration must be performed while the drone is stationary and not currently flying. |